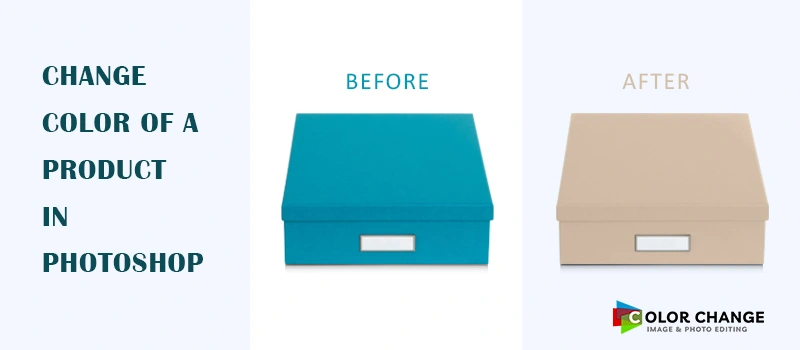
Color is the first thing that matters more than anything for a product photo. In e-commerce, customers don’t have access to inspect the quality directly. According to 87% of online shoppers, product image becomes the main parameter to assume the quality of a product. Color is the most important factor here. So, how to change the color of a product in Photoshop?
Raw images are never going to give you the perfect-looking colors that you expect. Color changing is the only available option for that. That’s why product photographers and eCommerce owners are eager to know about how to change the color of a product in Photoshop.
For those people, Color Change Service has made this easy tutorial on how to change the color of a product in Photoshop. We are going to use a box as the product.
Step 1: Open Your Product Image in Photoshop
First of all, we have to open the product image in Photoshop to change the color. For this tutorial, you are going to use this box as the product.
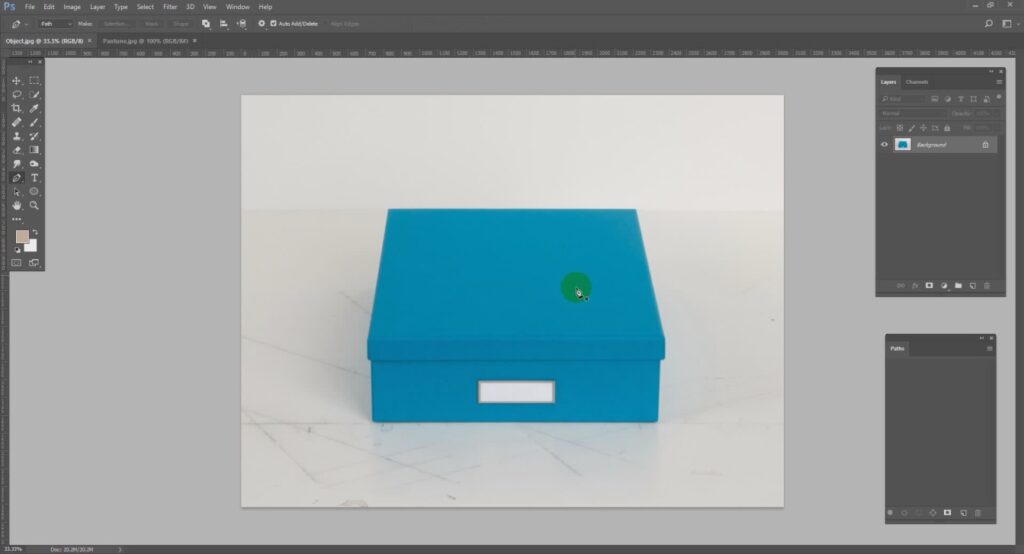
You can follow this tutorial to change the color of a product in Photoshop. It is applicable for all products including Amazon and eBay products.
Step 2: Create Paths For Precise Color Change
We are going to change the color of the box. But we don’t have to change other areas of the image. So, we have to make a precise selection so that we can change color precisely. Pick the pen tool from the left side and make a selection using the tool.
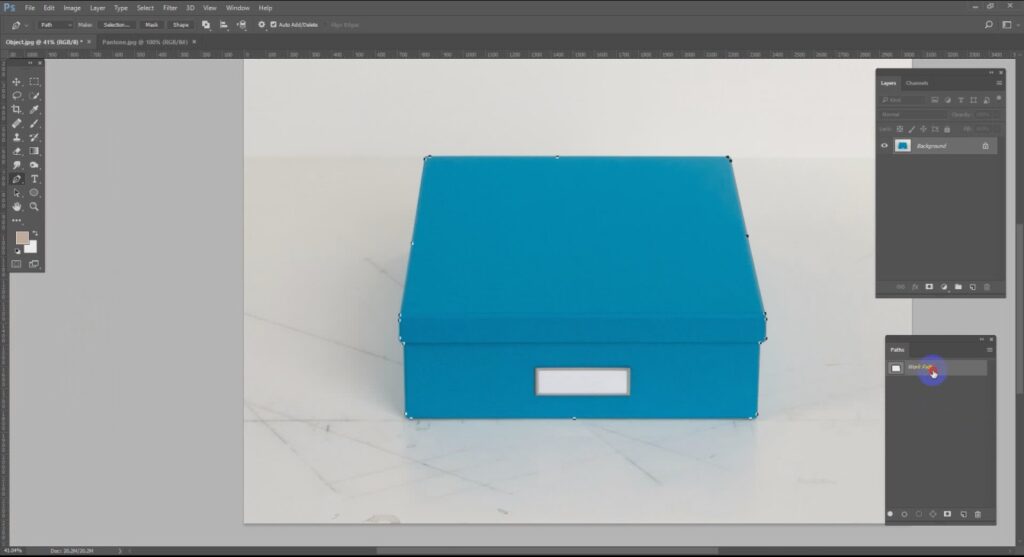
You should select the product properly and make sure that you have created paths for the entire product. If there is anything you want to exclude from the selection, you have to create a different path for that area. After that, you have to make a selection of the created path.
Step 3: Pick The Sample Color
At this point, we have to choose the sample color that we want to bring through the color-changing process. For this box, we have a sample color. We have to click on the sample color and get the color code from the color picker. For dress color changes, you should pick the color of the dress.
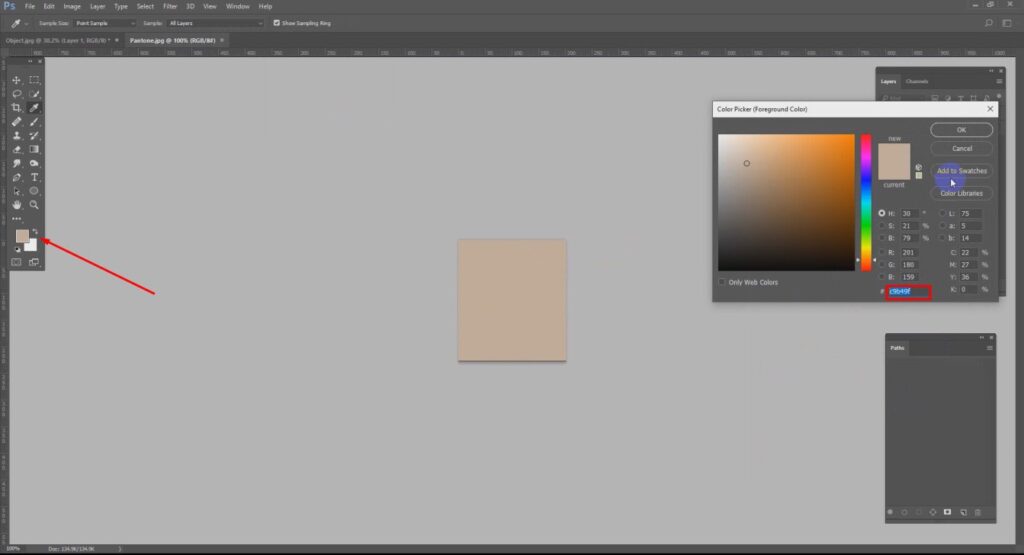
Now, we have to click on the adjustment layer and select the “Solid Color” from that list. Then, paste the color code of the sample color in the solid color layer. That will change the initial color of the object. We have to bring more accuracy.
Step 4: Change The Blending Mode
We have to click on the blending mode from the layer panel and choose the color option. You will get the option from here.
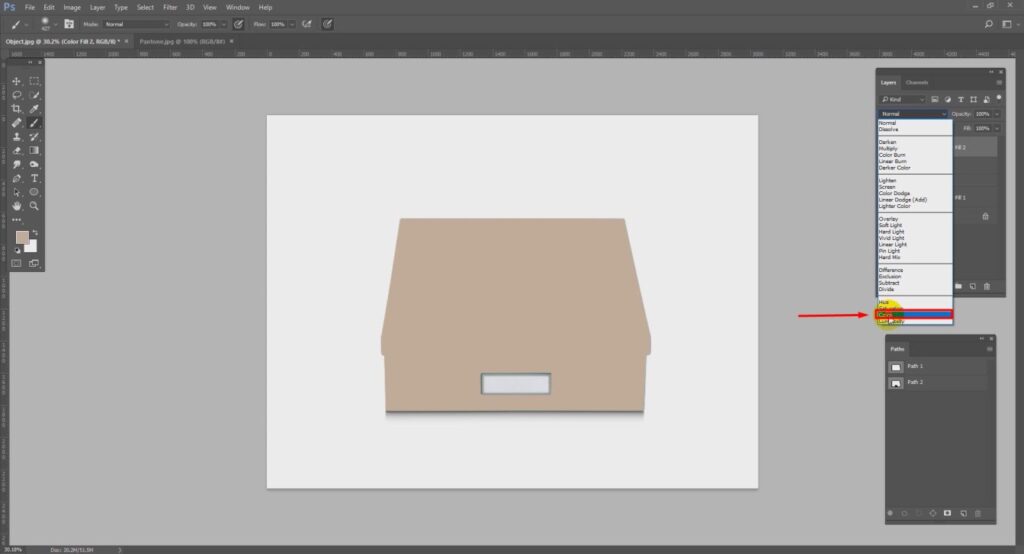
Then, you have to click on the mask icon from the color fill layer. It will select the selected area. After that, you have to change the level from the layer adjustment option and set the level according to the requirements. You can keep it around 3
Step 5: Match With The Sample Color
Now, we have to match the sample color with the image that we are working on. Copy the sample color portion and paste it on the image to get a better visualization of the required color. In that way, you will be able to change the color of a product in Photoshop according to the Pantone color.
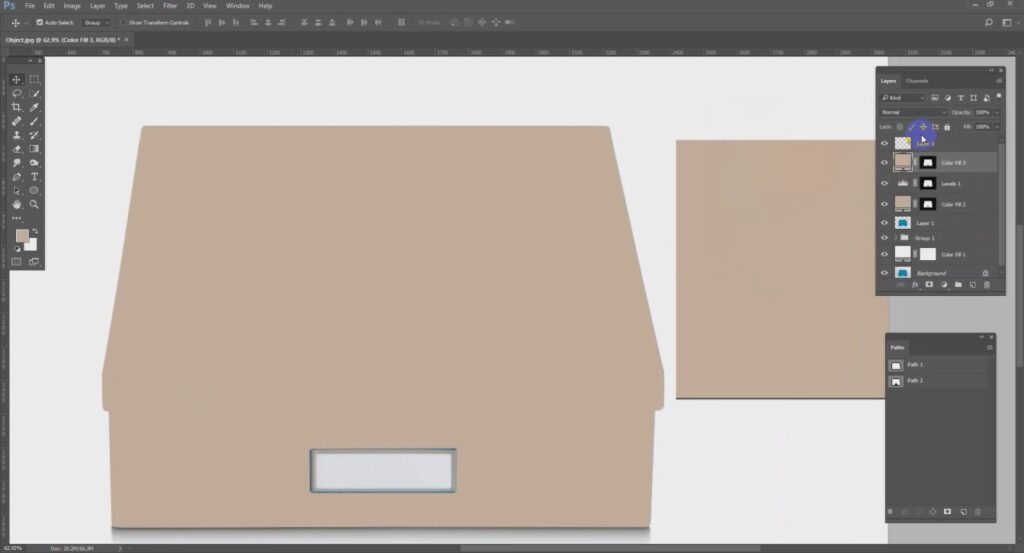
Click on the solid color layer once again and change the product color according to the sample color. Then, we have to make some adjustments to the inner area of the box. So, let’s do that.
Step 6: Work On The Inner Area To Change The Color Of Product
Now, we just need to click on the path 2 to select the inner area of the box. Press CTRL and click on the path 2. It will enable the selection option for the inner portion. After that, you have to use the color replacement tool to fix the color for that area.
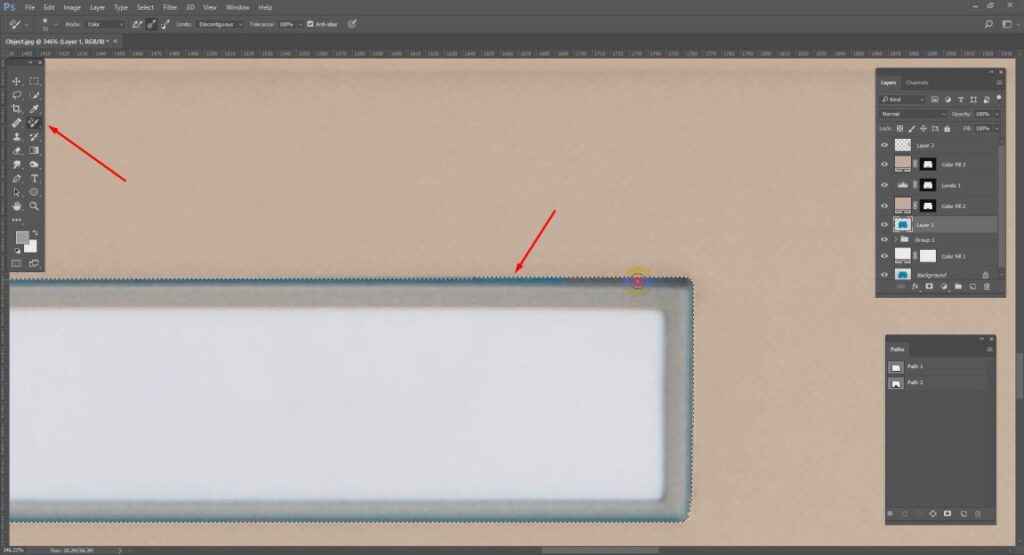
In that method, you will be able to change the color of a product in Photoshop for any item. When you are okay with the color, combine all layers into a group. You can do that by selecting the layers and pressing CTRL + G.
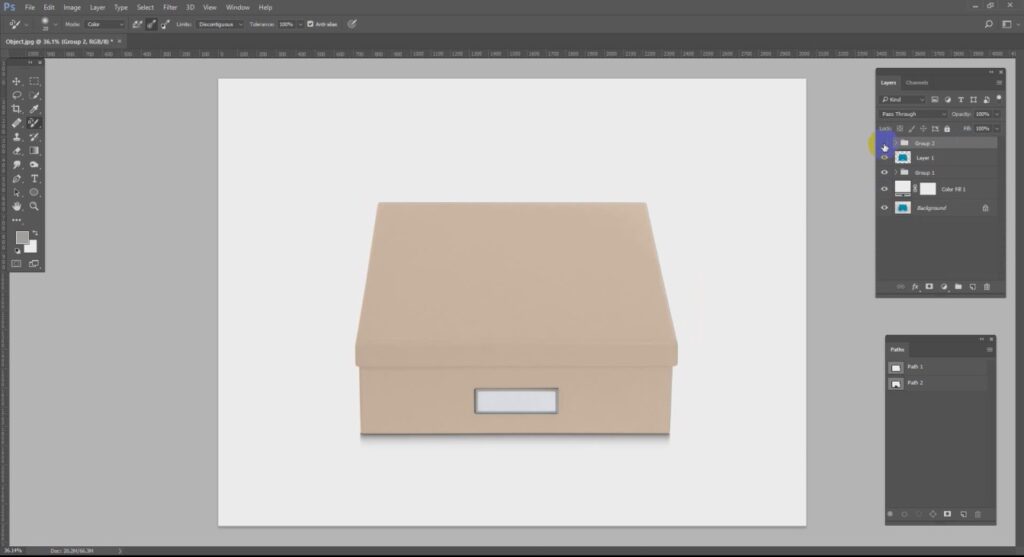
Then, you will get the product image ready with the required color.
3 Golden Tips
1. Copy the color code of the sample color to bring exactly the same color for the product. Also, keep the sample colors side by side for better comparison.
2. Must get the advantage of Color Blend Modes to achieve a natural color that blends perfectly with your image. Apply “color” mode to change furniture color.
3. Use Layer Masks to isolate the product from the background. It will make the product photography smooth with a professional color-changing touch.
3 Worst Mistakes
1. Don’t change the color directly without taking a new layer. It won’t give you the option to see the reference of the actual color.
2. Don’t use the Paintbrush Tool to manually change the color. It will look fake and have unrealistic tones. It will distract viewers causing losing trust.
3. Don’t focus on the color only to bring your perfect color. You have to adjust the light and shadows if needed. Otherwise, it will be misleading.
Why Should I Change the Color of a Product in Photoshop?
While following the tutorial on how to change product color in Photoshop, you might be wondering about why to change the color of a product in Photoshop. Actually, this is the most convenient option for product photographers and product sellers to get different colors without capturing the product multiple times.
Changing the colors of a product gives you the benefit of getting the required color. It will save you time and money. At the same time, viewers will be happy to get the exact color variation. That will make it easier for them to make a purchasing decision. Overall, it will be beneficial for your business.
How To Avoid Color Bleeding When Changing The Color Of A Product In Photoshop?
Color bleeding is a common problem for beginners and new editors. That means you are trying to apply color for a specific object but the color gets applied unintentionally in other areas. So, how can you avoid color bleeding while changing the color of a product? Accurate selection is the solution to that.
Before applying color to an image, you should select the area using a precise selection tool. You can use the pen tool or quick selection tool. In the latest version of Photoshop, the object selection tool is also available for that. Apart from that, you can apply color change with a selective color option to avoid color bleeding.
Sum Up
From now on, you should not have any problem with how to change the color of a product in Photoshop. The above tutorial on how to change product color in Photoshop is made by a highly experienced designer. By following this tutorial, you should be able to change the color of a product in Photoshop that looks 100% realistic.
When you have bulk images to change the color, it is almost impossible to do it yourself maintaining precision for all images. You will need expert assistance for that. Don’t worry. Color Changing Service is available to help you with any type of color-changing requirements. Get the service now with a special discount. Let’s get a free trial.
FAQ’s
How do I change a specific color in Photoshop?
You change a specific color in Photoshop by choosing the color from the selective color option. Also, you can select a specific color using a selection tool. The changes will be applied to that color only.
How do color match products in Photoshop?
You have to use the Eyedropper tool from the properties window to color-match products in Photoshop. Also, you can apply the color code in the color picker to match a specific color for your products.
How do you change the color of an object in Photoshop?
In Photoshop, there are multiple options available to change the color of an object in Photoshop. You can change the color with hue saturation adjustment, and selective color. Also, you can apply colors using the brush tool.
Can I change the color of a product in Photoshop without changing other colors?
Yes, you can change the color of a product in Photoshop without changing other colors. You can do that by making a selection for the product. Also, you can use selective colors for the product.
Will the color change look realistic?
Color change is the most important step of image post-processing. The color change looks realistic only when it is done professionally. Color Change Service can ensure that the color change results will look 100% realistic

